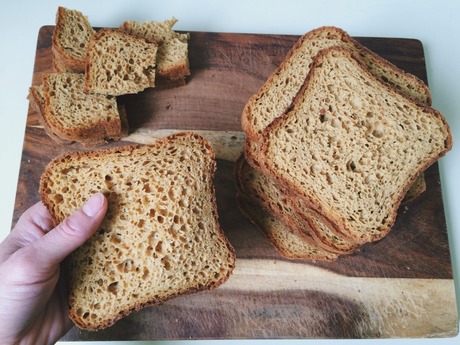
 I’m entirely overdue on posting this recipe. I’ve worked on it over the course of the last two years and here’s what has shaken out of my experiments with sandwich bread that makes me feel like a normal sack-lunch person.
I’ve made some changes to Gluten Free Mommy’s recipe, which alternately appears and disappears online (I don’t know what to say about that). She made it in the oven all the time. I make mine in the bread machine, not for convenience, but for shape and texture. I haven’t been able to pull off the store-bought shape/size in the oven. I’ve included both the bread machine version and an oven variation.
Oatmeal Millet Bread
A few hours before you plan to bake. Set out on the counter 3 eggs. They’ll need to be room temp.
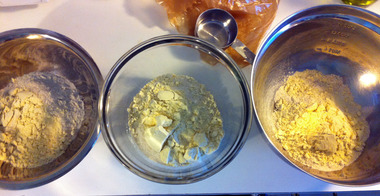
1. Mix your flours
- 1/2 cup brown rice flour
- 1/2 cup millet flour
- 1/2 cup arrowroot or tapioca starch
- 1/2 cup sweet rice flour
- 1/4 cup flaxmeal
- 1/4 cup oat flour (grind your own by putting rolled oats in a food processor)
- 2 Tbs potato starch
- 2 tsp xanthan gum
 Oat flour is $9 at my grocery store, a bag of GF rolled oats is $6; plus, you get some breakfasts out of that cost!Though it won’t really be oat millet bread any longer, you could use 2.5 cups of a gluten-free flour mix like Pamela’s instead of the above. It’s really sweet that people who are not gluten-free like to bake for those of us that are; it’s kind of unreasonable to ask those occasional GF bakers to buy and keep all the different flours on hand.
2. Add the rest of the dry ingredients
- 3 Tbs brown sugar
- 1-1/2 tsp salt
3. Whisk together your wet ingredients
- 3 eggs, now at room temp
- 1 Tbs molasses
- 4 Tbs (half a stick) unsalted butter, melted
- 1 tsp cider vinegar
- 1 cup room temp water (between 80-100 degrees F)
4. Pour wet ingredients into the pan of your bread machine and then layer dry mix on top. Make a hole an inch or so deep in the dry flour mix and pour in it the contents of an active dry yeast packet (or 2.25 teaspoons bulk active dry yeast).
5. Program your machine to the equivalent of a basic rapid setting, which should take between 2 and 2.5 hours to complete.
Oven variation
The cool thing about doing this dough in the oven is that you don’t necessarily have to make a loaf. I’ve used the same recipe for making dinner rolls and hamburger buns. All ingredients are the same, except the water will need to be slightly warmer.
Grease loaf pan or baking sheet (depending on what you’re making).
1. Proof contents of active dry yeast packet with 1 tsp sugar in 1/4 cup of warm water (no hotter than 120 degrees F). Let that puff up for 10 min while you mix your flours (same as above).
2. Place all wet ingredients EXCEPT the 1 cup water into the bowl of a stand mixer (you could mix by hand and build muscle!) and combine using the paddle attachment.
3. Slowly add your dry mix to the mixing bowl (1/2 cup at a time, to keep it from ending up in your hair).
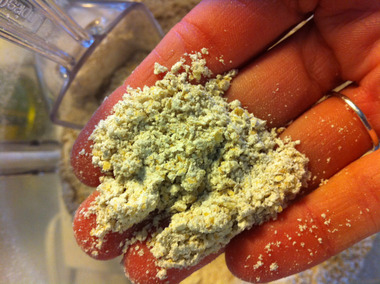
4. Once your dry mix is completely incorporated, add, in portions, your 1 cup warm water (120 degrees F). You might not need all of it, so go slowly and pay attention to your dough. The consistency you’re after is sticky and light, like a cake batter. Adding too much water will make your loaf/rolls flat.
5. Mix on med-high for 10 minutes.
6. Pour dough into prepared loaf pan or grease your fingers really well and shape dough into rolls aka dollop as gracefully as possible. It’s going to be super-sticky so try to touch it in as few motions as possible (and try to remain patient). Grease a sheet of cling wrap and cover your loaf/sheet completely.
7. Let dough rise for 1-2 hours, or until it has doubled in size. Preheat oven to 400 degrees F. I like to brush the top of my loaf/rolls right before baking with melted, unsalted butter for a nice browning effect.
8. Baking time will depend on what you’re making. A loaf (~35-40 min) will take longer than rolls (~15-20 min). Use your nose to determine what’s going on in there, and use a thermometer if you’re nervous. The internal temp should be between 190-200 degrees F.
Storage
I’ve found the best method to keep this bread is to wrap it in waxed paper and tie it up (like a present) with kitchen twine. Don’t refrigerate, which will dry it out faster. If you haven’t gobbled the whole thing within two days, slice it up and store it in the freezer. It will resemble the consistency and texture of regular gluten sandwich bread most on the day of baking. As it ages, it feels a bit denser, though a little run through our convection toaster oven usually revives that fresh-baked feeling.
Time-saver tip
When you’re mixing your flours, pull out a couple extra mixing bowls and make an extra batch or two to keep in the fridge. Next time you’re ready to bake, the tedious part of measuring out flours and such is already done!