
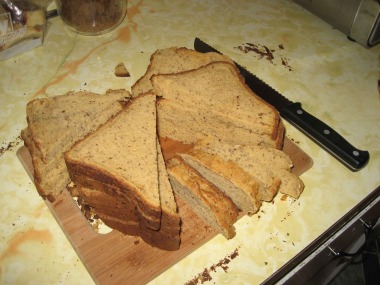
 Look! It’s even the right shape.
UPDATE: While this recipe is great and will absolutely work, I’ve streamlined it a bit and think you might be best heading over to the newer post (also linked below in the recipe as the place to find the oven variation).
Everyone who comes over to my house (or encounters me in potluck scenarios) has asked for this recipe. I apologize for the delay, it’s not out of covetousness. I didn’t create it, I modified it from my beginner-baking, gluten-free bible, Gluten Free Mommy. [update: she’s gone on hiatus again, see below]
Her blog wouldn’t pull up for about a week at the beginning of this year, during which time I nearly had a nervous breakdown. After panic subsided, I realized that modifying recipes from their original gluten-full state was not as hard as I’d previously decided.
Thankfully, her site came back up, with new recipes. She hasn’t posted anything since, but at least I know she’s alive and well. [or moving blog hosts, contact me through the form on your right if you want the original, oven recipe]
I quit mourning for the disappearance of someone I still can’t get to return my email, and ended up equipped with a better sense of why certain flour combos or starches work better than others. The route of a little practicality beyond doggedly following recipes turned out to be the best thing that’s happened to my baking thus far. Meanwhile, Natalie’s probably just busy with her kiddos, not meaning to startle me into baking revelations.
Note for baking newbies: This may seem like a shit-ton of ingredients (especially if you have none of them so far) but you’ll get your money’s worth when you stop paying $6 for a loaf of disgusting bread (that must be toasted to taste like regular bread) and make your own just-like-everyone-else bread. That’s right. You can have regular ol’ peanut butter and jelly sandwiches on this bread.
I make a loaf weekly, more often if we have guests (or tasty preserves in the house.) We only pay for ingredients on an as-needed basis now (translate: unbelievably cheap, homemade, kick-ass bread.) And yes, it turns out better in the bread machine; I’ve baked it both ways many, many times.
Millet Oatmeal Bread
Adapted for the bread machine from original recipe by Natalie Naramor at glutenfreemommy.com, finally perfected from my very first attempt last fall. No breadmachine? See this post for the oven variation directions
1. Whisk the following together in a large mixing bowl:
1 cup brown rice flour
1/2 cup certified gluten free oat flour*
3/4 cup millet flour
1/2 cup tapioca flour
1/3 cup arrowroot starch, or cornstarch
1/3 cup sweet rice flour, also called Mochiko
1/4 cup flaxseed meal
1 Tablespoon xanthan gum
3 Tablespoons brown sugar
1-1/2 teaspoons salt
*Bob’s Red Mill makes gluten free rolled oats; save money by pulverizing the rolled oats into oat flour in a food processor.
I had a difficult time finding sweet rice flour. If you can’t locate certain items at local stores, try ordering them online.
2. In a separate, medium-sized bowl whisk together the following:
3 eggs (must be at room temperature)
1 teaspoon apple cider vinegar
1 Tablespoon molasses
4 Tablespoons (half a stick) butter or butter substitute, melted
1 cup warm water (80-105° F)
1/4 cup plain yogurt, buttermilk, sour milk or whatever you have (also room temp)
You want your wet mixture to be at or just above 80° F so the yeast activates properly in the machine; use your basic kitchen thermometer and check the wet mixture’s temperature as you add the ingredients, you may need to alter the temperature of the warm water to bring the temperature up or down here.
3. Pour the wet mixture in the bread machine pan and then layer the flour mixture on top (not mixing the two.)
4. Create a small indentation in the flour with a spoon and pour 1 packet of active dry yeast (found in the baking aisle of your grocery store) in the hole.
5. Select the two-pound loaf size and use the Basic Rapid (or something similar) setting, which ends up being about 2 hours and 15 minutes. Some newer model bread machines have a gluten-free setting. As it gets going, you’ll want to scrape the sides with a spatula to make sure all the flours incorporate into the wet mixture.
6. Patience! The same goes for bread machine loaves as does for traditionally baked loaves, wait for the loaf to cool completely before slicing it. Don’t refrigerate the loaf. If you don’t eat the entire loaf within two days, slice and freeze it (in freezer-specific bags.)