
I’m pretty into vinegar fermentation lately since it’s such a great way to divert food waste, which I touched on briefly in this post. In fact, I’m talking about vinegar making all day with New Museum Ideas City 2013 Streetfest goers (a free, fun way to spend an afternoon in NYC) today!
No matter where you live you can still make any kind of fruit vinegar from a pile of scraps, water and a little sugar.

When using scraps for vinegar, we’re creating this distinct kitchen helper in two steps, first we need to create booze (yeasts on fruit eating the sugar water) and then we need to expose that boozy, bubbly liquid to open air so bacteria (acetobacter) can work its vinegar-making magic. The first step takes about a week, the second takes about 2-4 weeks depending on the temperature at which you’re fermenting. Vinegar loves hot apartments/kitchens (the ideal temp for acetobacter being around 80-100 degrees F) and doesn’t require much in terms of equipment. Your roommates and friends need to be on board since there’s a distinct (though not terrible) vinegar smell that starts forming as step 2 gets underway.
Stage 1: booze formation. (See recipe below) This needs to be swirled at least once a day for a week to prevent formation of mold on top of scraps.
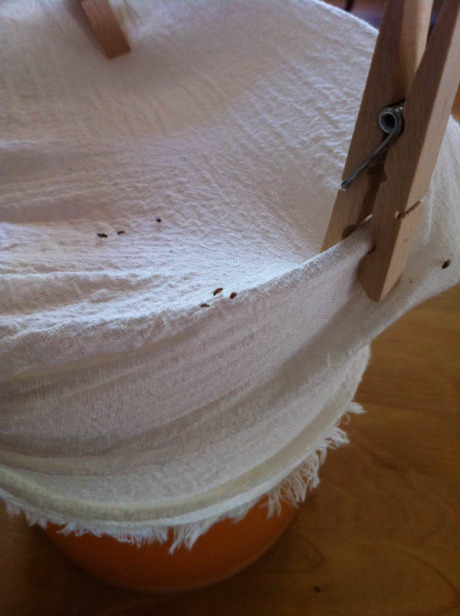
Step 2: Strain scraps out (and compost them) and expose fruity booze to air via a cheesecloth or dishtowel cover.

This post about peach vinegar and this post about apple scrap vinegar shares the methodology along with photos of those projects as well; you can always sub whatever fruit scraps you have on hand with the exception of citrus, from which I’ve tried a few times to make vinegar and didn’t have much luck. (My advice would be to infuse existing vinegar with zest peeled in strips from the fruit with a potato peeler).
Fermented Strawberry Vinegar
STAGE 1
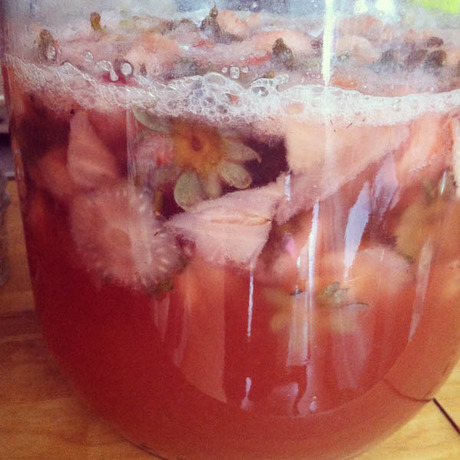
1. Place strawberry hulls/greens/bruised or mushy spots (anything but moldy pieces) in a wide-based glass, ceramic bowl or food-grade plastic container. Avoid metal bowls or containers.
2. Dissolve 1/4 cup sugar in 1 quart room temp water, pour over the scraps and repeat that ratio/process as many times as needed to give you one part scraps to two parts liquid. You can use honey here, but it will take longer for the fermentation to get started. The goal is to create strawberry wine (and then chuckle that you know that terrible song by the same name). In the end of the process, you’re not really drinking/eating the sugar at all thanks to the yeast on the fruit.
Cap the jar or cover the bowl with cheesecloth or a thin dishcloth. Stir the scraps daily to allow for the bubbling that will occur as the yeasts eat the sugar and to prevent surface mold from growing.
STAGE 2
3. After one week, strain the scraps from the strawberry booze and pour the liquid back into the same bowl (you can wash it in between). Add a splash of a raw vinegar, like Bragg’s Apple Cider vinegar to help get the acetobacter started (if you don’t have any on hand, then omit it entirely and everything will still work out great). Here’s where you add a vinegar mother (see following photos) if you’ve been a busy vinegar maker. Tail ends of last year’s batch of live-cultured fruit vinegar work great too!

Cover again and let sit for another two weeks—stirring every few days at first and then swirling the bowl gently as the ‘mother’ forms on the surface of the liquid.

Vinegar mothers are handy for new batches of scrap vinegar (though it’s not necessary, since the mother forms itself and reproduces herself anyway) or can be dropped into any existing wine to jumpstart a wine vinegar!
The vinegar is finished when it smells and tastes like vinegar, around the end of 2-3 weeks.
4. Pour the vinegar (and ‘mother’) into a large jar and cap tightly. If straining before bottling, set the mother in a bowl while you strain out the particles that formed over stage 2. I usually rinse the mother in room temp or cool water and drop it back in the finished jar. Store bottled vinegar at room temperature, where it will keep indefinitely. The vinegar will age nicely and develop a more complex flavor.
Here are some things you might encounter on your vinegar making path:
- Fruit flies, not the end of the world of course; I’ve noticed it happens when they’re already in the house from other things. Just don’t let them get onto the surface of your vinegar/mother.
- Filmy or odd residues in Stage 2; no cause for alarm. As the acidity increases, these filmy things lose the battle and vinegar wins. Don’t fret over them since when you do your final bottle, you can strain all this out through cheesecloth.


- Sediment-y settling. Like with above, a strain through cheesecloth before final bottling will take care of this.
