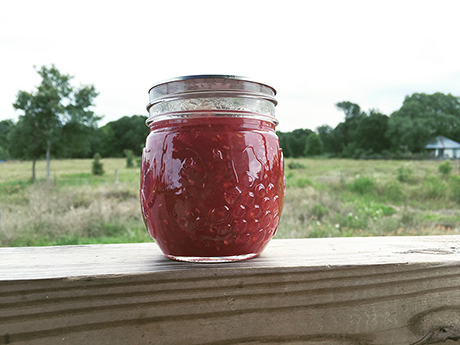
Turn rhubarb and raspberries into a summer sauce for desserts, breakfast spreads or even cocktails.
Your Custom Text Here

Turn rhubarb and raspberries into a summer sauce for desserts, breakfast spreads or even cocktails.

When the going gets tough in the kitchen…make a fruit crisp. How I’m busting out of my too-busy-for-everything kitchen rut.
Those of you who follow my instagram feed might recall last month how I spent the majority of my kitchen time obsessed with making pudding. My first go at pudding was for my book club meeting discussing our last book, Milk by Anne Mendelson. (I loved the book by the way, a must read for anyone interested in the history, science and everything else to do with cow dairy!)
Anne’s recipe for chocolate pudding got my attention, primarily because a. I had all the ingredients, b. I could make it the day before book club and c. I had Mast Brothers baking chocolate burning a hole in my pantry shelf. I’m including a recipe below, but it is hardly modified from the original in Mendelson’s book, which was attributed to Fannie Farmer.
I haven’t tried using other kinds of milks, but cornstarch is cornstarch and would probably bind whatever milk product you and your gut approve of. Please do keep me posted if you try it with dairy milk alternatives!
Mexican Chocolate Pudding
yields 4 ~8oz servings
1. Heat in a large saucepan over low heat 1-3/4 cups whole milk (or any percentage of milk plus cream) with 2 oz semi- or bittersweet chocolate. Adding any amount of cream will make your pudding resemble one of my most favorite desserts ever, pots de creme.
2. While the milk and chocolate reaches a simmer, combine the following in a small mixing bowl and whisk to combine:
1/3 cup coconut palm sugar (or regular white, brown, or whatever sugar you want)
3 Tbs cornstarch
1 tsp salt
1 tsp cinnamon
3. Add 1/4 cup cold milk to the dry mixture and whisk thoroughly until smooth. Set aside.
4. Stir milk and chocolate saucepan contents and continue to stir until chocolate is melted. Raise heat to bring mixture to simmer (med-low) if it is not already simmering. Add contents of the small mixing bowl and stir with a heat-proof spatula and scrape to ensure milk doesn’t scorch on the bottom of the pan. Raise heat again to medium.
5. Pudding will begin to thicken and how quickly this happens depends on how much fat is in the milk. If you added cream in any proportion to the milk, thickening will happen very rapidly. Whole milk will take anywhere from 4-8 minutes to thicken. Stir regularly, but not so maniacally that you risk disturbing the starch chains that the cornstarch is trying to pull together. (This line seems fuzzy to me, but roll with it. Your pudding will come
out fine, I’m sure.)
As your pudding begins to thicken, reduce heat to low and keep stirring until it reaches the consistency of the pudding you want to eat.
6. When it gets there, remove saucepan from heat, add 1 tsp vanilla extract and continue to stir mixture to allow it to cool. You will be stirring for the next 10 minutes or so, so get comfortable.
7. When pudding is warm-ish, or just above room temp, scoop it into small ramekins or cups. You can
optionally cut rounds of parchment paper and push them flush with the top of the pudding to prevent a ‘skin’ from forming on the surface. Many people love the ‘skin’, and I’ve deemed it too much hassle to cut rounds (because I don’t want to set plastic wrap directly on the warm, fatty surface of the pudding for toxicity purposes), so we enjoy a little texture on the surface of our pudding cups!
Refrigerate for up to 5 days; condensation and/or any liquid forming on the sides of the cups and surface as they cool is totally normal.
Copyright © 2009-2020, Kate Payne unless otherwise noted. All rights reserved.