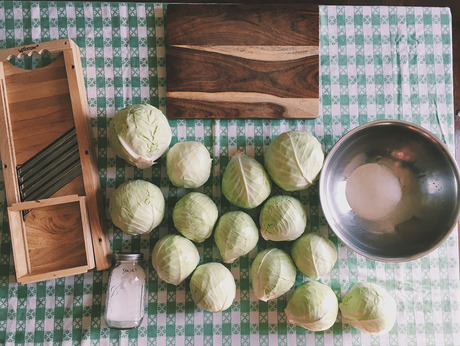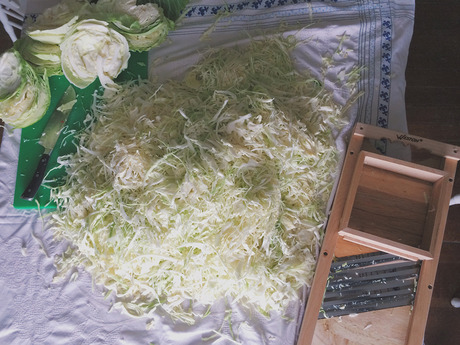
I’m really enjoying the annual tradition of sauerkraut making in our home…two years in a row counts as annual, right?
My great grandma Rose would make her kraut for the year every fall and keep it throughout the winter and spring in her Minneapolis cellar. Unfortunately, I never learned directly from her as I was 6 when she passed away. No matter where you learn the art of an annual preserving project, you are keeping the memories and long lines of food history running in your family by rekindling those projects and teaching others.
Since I’ve done this cabbage breakdown for a couple years running, I’d like to share some tips to make your first kraut session a success.
1. Use a tablecloth
All the shredded wonders of the world are going to live on your table or counter top indefinitely if you aren’t able to physically pick up the floor beneath them and shake it out outside. I started using a tablecloth since shredded cabbage from my kraut slicer was too voluminous to be contained on a cutting board. The ability to pick up and move the shredded cabbage in the event of, say, lunch or dinner, is also an added bonus.

2. Make it a party
While you can certainly put up 25lbs of cabbage in your 10 liter crock on your own like I have, you absolutely don’t have to have that equipment, stamina and volume to do this type of project. I suggest gathering 4-6 friends and asking them each to bring a half gallon or gallon jar (or even a few quart jars if that’s all they have). Here are the supplies/volume breakdown per person with a 64 oz (half gallon) jar:
approximately 4lbs cabbage (or 4 small to medium heads)
8 tsp sea salt
10 black peppercorns (optional)
5 juniper berries (optional)
1 bunch fresh dill or 2 Tbs dill seeds (optional)
3. Set-up for success
In order to maximize your tabletop real estate, I suggest setting up a few stations:
If one of you has a kraut shredder (essentially a giant mandoline), that will be its own station and requires the most room since you are trying to corral the shreds that land underneath the shredder in some sort of cohesive pile toward the middle of the table space. If no shredder is available, then rock it out using this cabbage shredding tutorial. Have a few cutting board/chef knife set ups available to keep the shredding action moving forward. You will have a fairly large pile of discarded outer leaves and cores so leave room for those.
Station for a kitchen scale or two with the largest mixing bowls you have
Salt station near the scales with a couple 1-teaspoon measuring spoons; this is where you’ll massage your combined cabbage and salt in the bowl prior to packing
Packing station where attendees jars or fermenting vessels get stashed and packed
4. Run of show
Here’s how this thing will go down:
cut the cabbage
tare the scale with the bowl on it and then weigh out 2-4lbs of shredded cabbage (depending on the vessel volume desired for your end result, or if packing a large crock, still measure out and massage in smaller quantity like this)
add 2 tsp sea salt for every pound of cabbage you weighed in the bowl
allow it to sit for a few moments so the salt starts to dissolve, or just go right ahead and start massaging the salt into the shreds (this is a great task for kids)
When the cabbage starts to wilt a bit and is visibly dripping its water content (thanks to salt and massage), pack it into a jar or vessel prepared with the optional spices lined along the bottom or just pack it in plain
I like to line the top of my jar or crock with the outer cabbage leaves (washed) to weight down the shreddies underneath the brine
5. Give yourselves time!
Don’t rush a good thing. Be sure to allow at least 4 hours for your first time hosting this gathering. You may get it pared down as your kraut machine rolls on in future years. Share this tip sheet with your attendees so they know how to maintain their jar and finish the kraut ferment successfully (we created it for our Austin Fermentation Festival’s Kraut Mob a couple weeks back)!
