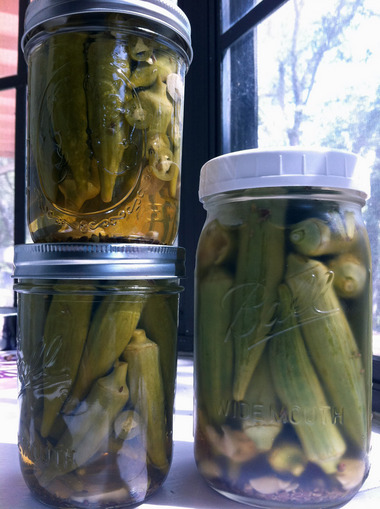
I’ll get to the pickles in just a moment, but first I wanted to briefly touch on recipes, as I’m entering a new phase for me personally, one where I’m doing a lot of recipe testing for my next book.
The thing about recipes (and posting to your blog the things you successfully follow along with in published books) is that someone did a lot of work to make sure that recipe works, such that you were even able to succeed in your attempt. When we lift stuff directly out of a book, without making any real changes that warrant a re-written/re-described version and then post it to the free, unlimited access realm that is the internet, we’re not properly honoring our inspiration.
That said, the internet is a great source of inspiration, and there are many talented, hard-working food bloggers out there who are legitimately adhering to an accepted code of ethics. But we as readers can’t forget to consult and honor the cooks and authors who spent countless hours developing, making, tweaking and testing the recipe, and then writing it up in a clear and understandable manner. A great published recipe, whether it is in a book or on a blog, represents hours and hours of hard work as well as no small amount of blood, sweat and tears. If we keep that in mind when discussing recipes, it will be easy to share responsibly.
I’d like to thank my friend Kaela, blog maven behind Local Kitchen, and Linda Ziedrich, author and preserver extraordinaire, for their help in crafting this post and drafting the following quick list of tips to help you remember what do when it comes to posting recipes:
- If posting a recipe that’s already online, link back to the original source
- Definitely don’t copy word for word (you know, plagiarism) from book or blog recipes. Other people read those books and blogs, too, and will know when you’ve borrowed in this way.
- If you want to publish an already published recipe as is, ask the publisher for permission.
- If you want to publish an already published recipe in your own words, with minor changes in ingredients, quantities, or method, just say your recipe is based on “insert original author here”, and, to be polite, cite the book or other source. You don’t need anybody’s permission to do this.
A couple of other friends have written about these issues lately, too; check out Marisa’s post called Making a Recipe Yours and Sean’s post about original content and attribution. Readers and writers alike are all a part of the same community; it’s good to check in and make sure we’re keepin’ it real, yo.
Linda Ziedrich was kind enough to magnanimously grant me access to posting her pickled okra recipe here on the blog (which I still don’t actually feel like I did enough to make it truly my own). If you’re busting into canning this season and looking to expand your oeuvre, I’d suggest adding her books to your to-own, to-check-out-at-the-library, or to-borrow list ASAP.
Thank you for hearing me out, and now onto the gracious pickled okra recipe. I’m actually going to make it small, so you can refrigerator pickle your stash and, in the event of an okra windfall, simply multiply and seal for shelf storage. I’ll also add that this recipe was initially requested by a friend who admitted to not even liking okra (while she and her kids polished off the remainder of a jar of them) at a recent event. Happy pickling!
Fridge Pickled Okra
Slightly adapted from the original recipe found in Linda Ziedrich’s Joy of Pickling, Revised Edition (The only significant change I’ve made is to use white wine vinegar in place of cider vinegar.)
yields 1-quart jar
1. Wash and trim the stems of 10-12 oz okra, no need for precise measurement here, your goal is to fill one quart jar so they’re packed in tightly. Smaller okra pods are preferable, but I certainly understand when life grants you ginormous pods (see quart jar above)! They still turn out delicious.
2. Clean your quart jar well, and add to it:
- 2 cloves garlic, sliced
- 1 tsp dill seeds
- [optional] 1 dried or fresh hot pepper, halved lengthwise (I used a serrano)
3. Pack okra into the jar, and don’t be afraid to really cram it in there.
4. To make the brine, dissolve 2 Tbs pickling or kosher salt in 1 cup distilled water and 1 cup white wine vinegar and bring to a boil in a small stainless steel saucepan.
5. Pour hot brine into packed jar and put a lid on it (I just like saying that). Don’t screw on the lid too tightly or some of the gasses that are the result of your okra nearly being pickles won’t be able to escape. (The lid might pop off when you open it later on, which, in this case, it’s still safe to eat.) Let sit on the countertop to cool for about an hour and then place jar in the fridge. (If canning these for shelf storage, process pints for 15 minutes and quarts for 20 minutes.)
Your pickles will be tasty after 2 weeks, dee-lish after 3 weeks and friggin’ fantastic after 4 weeks. Break into them whenever you feel the need. They’ll keep on the upwards of 3-6 months in the back of the fridge (says the forgetful pickler who has discovered many a treat waaaaay in the back…).

