Gluten-free gnocchi
Guest Post: Not My Great-Grandma’s Gnocchi
I hadn’t much experience eating gnocchi prior to going gluten-free. But I’m married to an Italian, who promptly gave me a pronunciation lesson after I mangled it: gnocchi (pronounced ny-ockee). Traditional gnocchi recipes don’t actually contain wheat flour (it’s there for the end step of rolling the gnocchi). When I saw Tamika’s Facebook post a few weeks back, I knew I’d be trying her recipe, and I thought you gluten-free folks out there might like to try it, too. After her years of experience as a gluten-baker, (and now gluten-free eater) she has crafted a fine recipe for us!
Please welcome Tamika to the guest post fold with this lovely xanthan and gum-free gluten-free recipe.
Tamika Adjemian is a lapsed professional cook and baker who started gardening, who went gluten free, developed a passion for making jams, chutneys, and kimchi, now raises chickens and teaches all of it in her Upstate NY community whenever given the opportunity. Her cottage business, Belle Jar Preserves uses local Hudson Valley fruits as much as possible http://bellejarcanning.com/. She blogs about home-made life and subrural existence at http://subruralalchemy.com/.
________________________________________________
I remember making gnocchi when I was young with my great-grandmother who was visiting from France. Grandpa got out the big piece of plywood he used just for dough, it covered the kitchen table. The board was coated into the grain with flour from all the loaves of bread, tarts and pastas that had been made over years.
I must have been bored rolling the gnocchi dough on the tines of a fork, likely running out to play, because what I remember next is heaped bowls of gnocchi that were baked in sauce.
Since going gluten-free, I have never found a packaged gnocchi I like. I decided to conquer it myself and after some experimentation (and a few failures later) I now offer up a recipe for good gluten-free gnocchi. My memory lapse with my great-grandma’s gnocchi is not too far away from how I modified the traditional recipe, because we skip the rolling part.
Traditional gnocchi also calls for dry white potatoes, what we know of as Idaho Potatoes here. I use Yukon Gold, since I had them on hand when I first developed this, and I like how they add moisture to the gluten-free flours.
Gluten-free Gnocchi
makes a few pounds, good for freezing
1. Put a pot of cold, salted water on your stove. Peel and cut 3 lbs Yukon Gold potatoes in halves or quarters (to be approximately the same size) and add to the pot of water.
2. Bring pot to a boil and cook until you can pierce the potatoes easily with a fork. Be careful to not overcook potatoes to the point where they’re mushy and fall apart. Drain potatoes, dump them back into pot and place over low heat, tossing the chunks around, and drying the excess moisture off them. When all the liquid is gone and they look a bit dry place potatoes in a big bowl and let cool to room temp.
3. Using a potato ricer or a medium screen of a food mill, mash the cooled potatoes. I use a nifty potato masher that has a ricer top. Whatever your technology try to get a fine puree to your potatoes, no chunks.
4. Make a well in your potatoes and add:
- 2 large eggs, beaten
- 1 tsp salt
- 1 cup brown rice flour
- 1 cup fine white rice flour (plus extra for rolling dough)
- 1/2 cup garbanzo bean flour or more if mixture is still too moist
- some fine chopped herbs, if desired (I used parsley and sorrel)
5. With a wooden spoon stir and fold all the ingredients as best you can. Dump the mixture out onto a rice-floured surface and knead gently, to incorporate all the ingredients. Scoop them into a single mound and let rest for 20 minutes or more. Make a sauce, go read, or do laundry; Gf flours soak up moisture like a sponge, the gnocchi dough needs for this to happen before placing little bits in boiling water.
6. Put a large pot of cold, salted water to boil. Meanwhile, using white rice floured hands, gently scoop some dough and roll it into a log about an inch in circumference. I find it easiest to do in small amounts and short logs. The lighter your touch, the better the gnocchi. You may get square shapes instead of logs, it’s okay, do your best, the first batch is a learning process (when all is done and eaten, it doesn’t matter, no one will remember the quirky shapes). As you’ve finished one log, set it aside and continue on to another until all the dough is rolled.
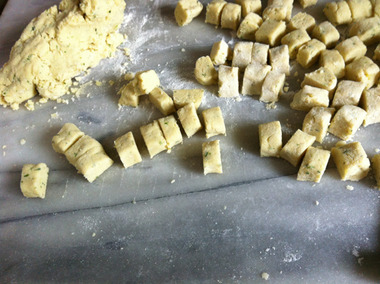
7. Using a sharp knife or dough scraper, cut the logs into 1-inch pieces. At this point it’s traditional to roll the gnocchi on the tines of a fork to make the famous shape, but we’re skipping that. Don’t worry about all the ‘resting’ your dough is doing, I found it very helpful to the overall texture. (At this point you may freeze the gnocchi, or some of them, if you wish. Place in one layer on a baking sheet to freeze individually, when frozen pour them into a freezer bag or container—to bring them back to speed from frozen, pick up right at step 8 below.)
8. Get ready a big bowl of ice water in the sink. Cooling the gnocchi quickly keeps them from overcooking before you sauce and bake or fry them.
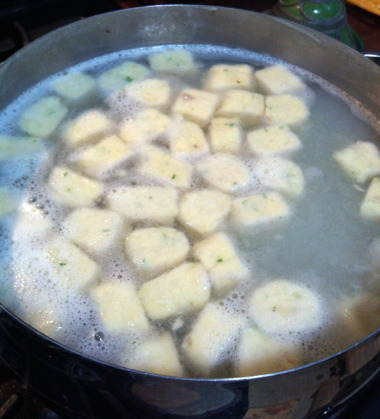
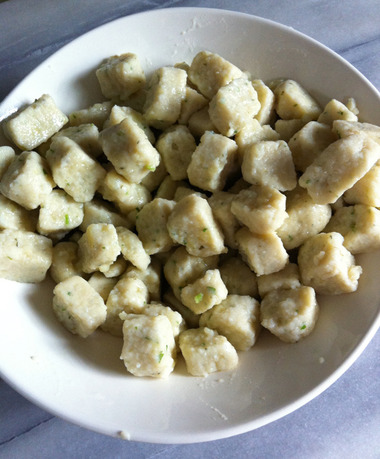
Gently drop a couple of gnocchi into your gently boiling water (there is a theme here!). It’s best to use a ladle or small strainer to lower the gnocchi into the water. Bits of potato will boil off and float in the water. If the gnocchi bop to the top with out completely falling apart, they’re perfect! Let them cook a minute then scoop them up with the strainer and place into ice water bath.

Continue on with the rest of your gnocchi, cooking/cooling about a dozen at a time.
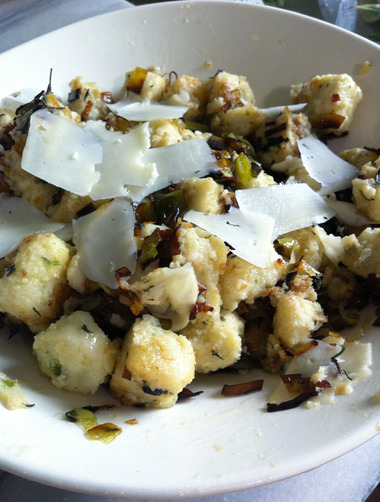
At this point you can prepare gnocchi anyway you’d like. Traditional is baked with pasta sauce and cheeses until bubbling. I fried some of mine in olive oil, then tossed them with crispy browned leeks, browned butter and asiago cheese, sprinkled with fresh thyme.


